MakerBot 3D-PO

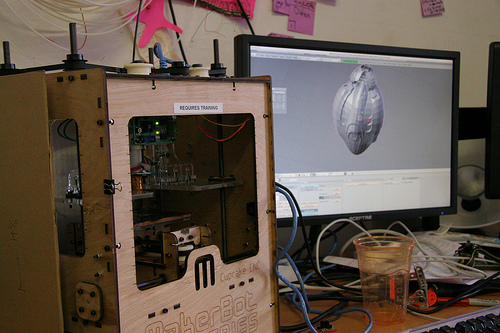
Our MakerBot is named 3D-PO and is a bog standard MakerBot 'Batch 5' Model. We print things.
Print Ninjas
These are the people that can print solo, and the people that can teach you how to become a MakerBot Print Ninja
- Jordan
- Adam (fynflood)
- Far
- Chis Tompson
- Adam[0]
Printing with 3D-PO
Each MakerBot is a bit diffent, since they are hand assembled. This is a how to for our specific MakerBot
First time printers
Take the class, or have someone at the space teach you 1) Download 009 version of ReplicatorG from : http://code.google.com/p/replicatorg/downloads/list 2) Unzip or unpack the package 3) If you have not used a USB FTDI cable before (or don't know what one is) you need to install drivers for them. Go into the ReplicatorG/Drivers folder, and install the right driver (Intel or PPC, be careful) for an FTDI cable (a USB cable that connects to embeded devices, like MakerBot).
Software
MakerBot specific:
ReplicatorG - The MakerBot's IDE Skeinforge - Converts STL to ReplicatorG sketch (gcode). SkeinFox - Easier-to-use than Skeinforge, can set multiple presets for converting STL to ReplicatorG sketch (gcode).
3D
Any 3D Rendering software that can export to .stl will work Blender is a good Open Source/Cross Platform 3d app.
Setting up Your Environment
Linux
(Dependencies are beyond the scope of this doc - If you can run the Arduino IDE, and have python installed, you should be set) This is what works at the moment. We'll probably put all of this into git or something pretty soon Download MakerBot.tar.gz (Needs updating, don't use yet, I'll do it asap)
- This is ReplicatorG, Skeinforge and JMil's files, known to work as of 09/08/2009
cd ~/
wget http://www.hive76.org/MakerBot.tar.gz
Untar it:
tar -xzvf MakerBot.tar.gz
Assuming your deps are up to snuff, you're all set.
How to test that it's all Working (Linux)
First and foremost, you should be able to run ReplicatorG, Skeinforge and Blender without errors (ReplicatorG will throw some errors if not connected to the bot)
Test Cube
This will walk you through getting a very basic STL file from Blender so you can test your setup.
Blender

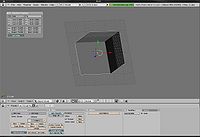
- Open Blender - you should have a default cube (Advanced users may not, this is all defaults)
- Resize the cube - press the 'n' key, and click 'Link Scale' Change DimX to 30.000, Press Enter
- Click File, Export, SLT...
- Change untitled.blend to testcube, and click the Export STL button - this save testcube.stl to your home directory
You have an STL that Skeinforge can understand, proceed!
Skeinforge

Now that you have a testing model exported to STL format from Blender, it's time to turn it into gcode.
- Open skeinforge
cd ~/MakerBot/skeinforge
python skeinforge.py
Assuming you're following all the directions here, you should be ready to continue. There are a few checks you should do first however:
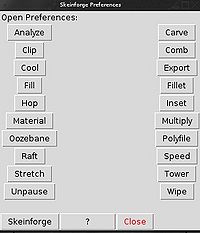
- Click the Analyze button
- Click the Behold button. Make sure Activate Behold is unchecked. Save Prefs
- Click Close
- Click the Fill button
- Make sure the Infill Solidity (ratio) is set to 0.1, and click Save Preferences - these are just test settings, and will be explained later.
Time to import
- Click Skeinforge on the lower left
- Browse to where you saved testcube.stl, highlight and click open.
- Get some beer - This will take some time.

If all is going well at this point, you'll see something like this in the terminal:
[fynflood@solanum skeinforge]$ python skeinforge.py
File /home/fynflood/testcube.stl is being chain exported.
snipped...
There will be more output when it's done, including the path to the newly created gcode:
....snipped
The layer thickness is 0.372 mm.
The text has 13801 lines and a size of 443.0 KB.
The total build time is 1688 s.
The total distance extruded is 42911 mm.
The total distance traveled is 44859 mm.
The volume extruded is 7 cc.
The exported file is saved as /home/fynflood/testcube_export.gcode
It took 258 seconds to export the file.
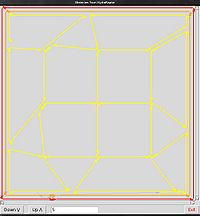
You will also get a box that shows the model layer by layer. Cycle through it with the 'Down \/' and 'Up /\' buttons You can find Skeinforge documentation here: [Skeinforege Wiki] That's it for Skeinforge!
ReplicatorG
At this point, you're just about ready to print. You should have /home/your_user/testcube_export.gcode Open ReplicatorG
cd ~/MakerBot/replicatorg
./replicatorg
ReplicatorG will open - Note, you'll get an java.lang.NullPointerException if you're not connected to the MakerBot
- Click File, Prefs - Make sure 'Monitor Temperature during builds' is checked.
- Click Machine, Driver, and check CNC Cupcake
- Click Machine, Control Panel - The Control Panel opens
To be continued!
Operating Instructions
These are rough, if you're not a ninja, don't attempt solo.
- Connect makerbot to your computer, turn on makerbot, open repg version 0009, open control panel (control-J), set temperature to 220 (hit tab key for setting to take effect) you should see temp start to rise
- Manually position extruder tip end at what you think should be 0,0,0 (dead center in the build platform and 1/2 a filament thickness in z== ~250 micrometers) and click the zero button (center of x-y translation cross-arranged buttons)
- Set the popup menu to 20 mm and move makerbot +20 mm in z (click +Z button after 20 mm is set)
Make sure makerbot stays at 220 at least 5 min before doing a test extrusion (see next) Test Extrusion: by now you should have makerbot at 0,0,20 and it should have been at 240 for at least 5 min
- Enter 255 for the PWM speed- then tab out of this field. this sets the motor speed (255 is max) and thus controls the extrusion speed for this test extrusion only. your gcode file will change extrusion speed throughout the printing process.
- Click the 'forward' radio button, you should see extrusion. let it go for 30 sec or so
- Click the stop radio button. when it stops oozing you can clear the test extrusion with the forceps.
If that extrusion worked you're good to go... almost!
- Check the top of your gcode file. if u used Jordans settings it will tell you to make sure you're at 0,0,20 and it won't do it's own test extrusion because it assumes you have it setup already
- Check the bottom of the gcode file. after printing it will finally position the printhead again at 0,0,20 -- MAKE SURE YOUR OBJECT IS SHORTER THAN 20, else you can set the z value to be 60 or 80 or whatever (should be the very last gcode command). you can check the z-height of your object by opening the stl file (that you skeinforged to get the gcode file) in blender and press the n key to bring up the info menu. the z-value will be the height of your object in mm.
- FINALLY-- do one more test extrusion (for 5 sec), then after you stop extrusion close any and all control panels (you might have multiple instances and if any of them are open they will ruin printing if they are open)
Be Careful: if you abort a print the controls will get confused so you should shut down makerbot and repg and start again Be more careful-- the extrusion head may or may not stay at 240 degrees when you're done, depends on the last lines of your gcode file. just be aware of whatever will happen. After an aborted or successful print open the control panel and set the temperature back down to 25C.
Printing Tip on other sites
Excellent tutorial, something new for everyone at all experience levels: http://www.shapeways.com/tutorials/prepping_blender_files_for_3d_printing