Creating a Class Product: Difference between revisions
From Hive76 Wiki
Jump to navigationJump to search
No edit summary |
(→Steps) |
||
| Line 11: | Line 11: | ||
* Under '''Categories and Tags''', select '''Classes''' | * Under '''Categories and Tags''', select '''Classes''' | ||
[[Image:Hive76_Store_Create_Class_Project_Step2.png|thumb|right|Figure 2]] | [[Image:Hive76_Store_Create_Class_Project_Step2.png|thumb|right|Figure 2]] | ||
* Under '''Price and Stock Control''', select '''Do not include tax''', select '''I have a limited number of this item in stock. If the stock runs out, this product will not be available on the shop unless you untick this box or add more stock.''' and enter the number of tickets you are selling for the class. (see Figure 2) | * Under '''Price and Stock Control''', select '''Do not include tax''', select '''I have a limited number of this item in stock. If the stock runs out, this product will not be available on the shop unless you untick this box or add more stock.''', select '''This is an Event and should generate a Ticket.''' and enter the number of tickets you are selling for the class. (see Figure 2) | ||
* Under '''Shipment Details''', select '''Disregard Shipping for this product''' | * Under '''Shipment Details''', select '''Disregard Shipping for this product''' | ||
[[Image:Hive76_Store_Create_Class_Project_Step4.png|thumb|right|Figure 4]] | [[Image:Hive76_Store_Create_Class_Project_Step4.png|thumb|right|Figure 4]] | ||
Revision as of 04:00, 6 March 2010
Things you will need
- The Date, Time, and Cost of your class
- Supplies Needed
- Standard class images or ones you created
Steps
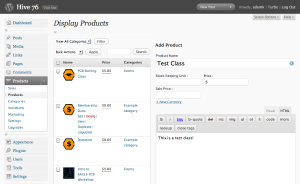
- Log into the Hive76 wordpress
- Click on Products in the navigation bar
- Click on the Products sub-menu
- Under Add Product, enter the product name, base price, and description
- Under Categories and Tags, select Classes
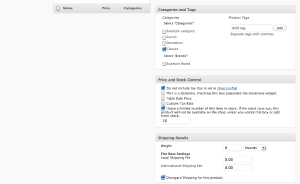
- Under Price and Stock Control, select Do not include tax, select I have a limited number of this item in stock. If the stock runs out, this product will not be available on the shop unless you untick this box or add more stock., select This is an Event and should generate a Ticket. and enter the number of tickets you are selling for the class. (see Figure 2)
- Under Shipment Details, select Disregard Shipping for this product
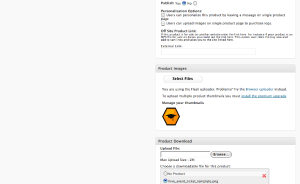
- Under Advanced Options, set Publish to Yes
- Under Product Images, click Select File and select Media:Hive_class_logo.png
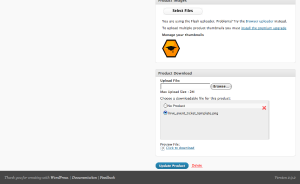
- Under Product Download, select hive_event_ticket_template.png
- Click Add New Product. If your class only has one ticket price, YOU ARE DONE!!! if not...
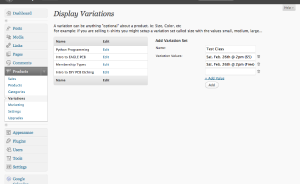
- Click Variations under Products in the navbar.
- Under Add Variation Set, enter the name of your class in the Name: box.
- For each date, time, and cost of your class, enter a Variation Value. You can add as many variations as needed.
- When done, click the Add button.
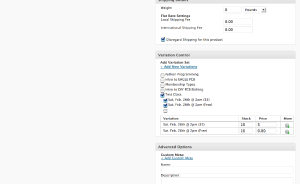
- Click the Products submenu under Products in the navbar.
- Find your product in the list and click edit
- Scroll down to Variation Control and select the variation you created for your class.
- For each variation, set the price
- Scroll down to the bottom and click Update Product
- NOW YOU ARE DONE!!!